*This is a recent post from my previous blog that I thought would be a good jump-start for the new blog!*
Here's a first for me: a craft tutorial. If you didn't know already, I read
a few
- ok ok - a lot of craft blogs every
week
day. I'm consistently impressed at the creativity of people out there. And I have many ideas stored up in my bookmarks toolbar for future craft sessions.
I also happen to really love Valentine's Day - not necessarily because of all the love and gushy stuff, but because my birthday is so close to it (February 16th, in case you forgot). ;)
And in honor of Valentine's Day I am presenting you with a picture frame tutorial inspired by my recent shopping excursion to Michaels. I just love that place - though my bank account doesn't love it quite as much as I do...
Anyway, on to the tutorial...
Valentine's Picture Frame Tutorial
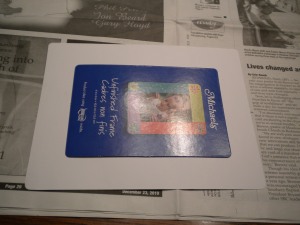
What you will need:
- An unfinished wooden picture frame - I got mine at Michael's for $1.00
- Scrapbook paper of your choice
- Mod Podge - I used glossy, but it doesn't really matter what kind you use
- An Xacto Knife - or another utensil to cut your paper
- Glitter
- Ribbon for the border of your frame
- A foam brush
- Some sort of throw-away plate for the Mod Podge
- Embellishments for your frame
- Hot glue gun
- Newspaper to cover your surface
(I added some of the materials after I took the picture. Sorry about that.)
What you will do:
Place your frame onto your paper and trace the frame - or just do what I did and cut around the frame with your knife.
Take out the insert from your frame and place it in the middle of the paper you just cut out. I'm lazy and didn't measure it out so that it'd be perfectly centered, but, if you so desire, be my guest. I eyeballed it to get it centered and traced it with a pencil. Then cut along the lines on the inside of the lines. I say the inside because you can always cut off more if you need to, but once it's cut the damage is done - take it from me.
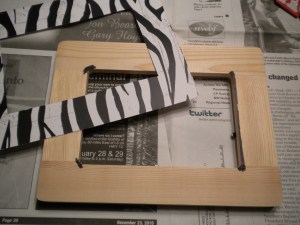
So now you should have 2 frames that look something like this. After I had the center cut out, I realized that I cut a little too much - see above. So I took a Sharpie and colored in some of the spots that looked like they might show through. And since my paper is zebra print, I could get away with it. Otherwise, use a marker that closest matches the color of your paper. OR you could just be a little more careful than I was.
This is where it starts to get really fun. Using your brush, put a coat of Mod Podge onto your wooden frame, and, as precisely as you can, put your paper frame on top. Make sure to rub it all over with your fingers to get out any air and to make sure it's all going to adhere to the wood. Work quickly, but be careful (especially if you're using thin-er paper). The paper I used was closely akin to cardstock, so it was a little more forgiving than regular paper. Once you've got the paper down, brush on another coat of Mod Podge, and let it dry. And then brush on another coat just to be safe, and let it dry.
If you're like me and need to stay occupied while you wait, treat yourself. My choice of treat: warm peanut butter bars with chocolate chips and Reeses peanut butter chips that I made earlier today - thank you Paula Deen for your baking genius. It went along perfectly with this...
My inspirational music during this project. Yes, I watch Glee and listen to the soundtrack. And, yes, I realize it's late. And, yes, I realize I don't have service - don't ask.
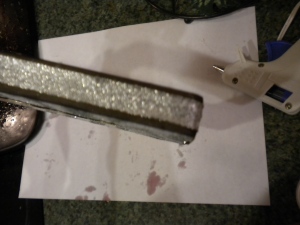
Ok. Now that we've waited...put another coat of Mod Podge on your frame and then cover it with glitter. Make sure to shake of the excess. And now, you guessed it, wait for it to dry again.
*Insert Jeopardy theme song here as we wait...*
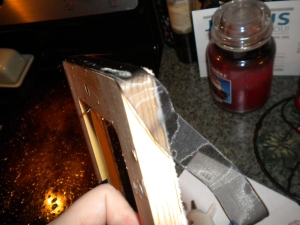
Once the Mod Podge is dry, use your hot glue gun to glue your ribbon around the border of your frame, as well as the inside border.
My ribbon was sheer black ribbon, and you could see the hot glue through it - yuck. So I decided to glue another strip of silver ribbon that I had on hand in the center of the black ribbon. Although impromptu, I like how it turned out.
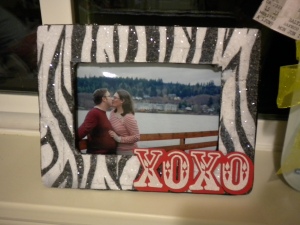
Now for the really fun part - add your embellishments! I picked up this "XOXO" when I bought the frame and just hot glued it on. PS - Isn't Michael's just wonderful?!
All you have left to do is insert your picture, and you're all set! I just love how mine turned out! And the added bonus is that I had all the materials on hand, with the exception of the frame and the "XOXO" that I got for $2 at Michael's!








1 comment:
love this! going to do one with monster truck paper for my son!! i love pics...thanks for sharing!
Post a Comment