We were at the store yesterday when I found this yarn and HAD to have it. It's Red Heart With Love - Fruit Punch. I used a J hook and the popcorn stitch. I used a generic flower pattern and stitched it on. Can't wait to wear my new cowl!!!
Showing posts with label yarn. Show all posts
Sunday, November 11, 2012
Sunday, November 4, 2012
Popcorn Stitch Baby Blanket
For the edging, you can follow this pattern:
Rnd 1 (gray - around the entire edge of the blanket): sc, ch 3, repeat until end of rnd, sl st in first sc.
Rnd 2 (gray): Ch 1, sc, 2hdc, sc in each ch 3 section, sl st in first sc.
Rnd 3 (yellow): Ch 2, *hdc, 2 dc, hdc*, repeat from * to * around entire blanket.
Fasten off. Weave in ends.
That's it. It's not my favorite blanket ever, but it's still pretty. And I think it'll be a little warmer than my previous Granny Ripple Baby Afghan. Can't wait to send this one to my aunt as well!
Tuesday, October 23, 2012
Team Spirit Infinity Scarf
I was browsing the yarn section at Joanns one day when I stumbled on this...
An infinity scarf. I used the pattern that was on the back of the paper wrap around the yarn - you can also find it online here. It was for a knit scarf, but I made mine a little longer and sewed the ends together to make it never-ending, hence the "infinity" part. It's so simple, too - basically cast on 18 stitches and knit back and forth (the garter stitch) until it's the length you desire, and sew up the ends with a yarn needle. Here's what Red Heart's scarf looks like:
What I love about it is that I can wear it in several different ways. I can wear it was one giant loop - a little weird, but that's beside the point. I typically wear it double-looped around my neck so that it's not suffocating but still warm (which is how I'm wearing it in the picture above). When it gets a little colder, I'll probably try wearing it triple-looped for added warmth. I can even have it wrapped around my neck and over my head and ears at the same time for those days I forget ear warmers!
The yarn itself is soft and easy to use (and relatively inexpensive). It automatically creates the stripes so I didn't have to change colors for each section, which was really nice and convenient. And the colored sections are all the same length, too. Another nice convenience. I didn't have to count anything except for casting on 18 stitches and recounting every once in a while to make sure I hadn't added or dropped any stitches (for some reason I always end up adding them when I'm using the garter stitch).
I finished the scarf in a reasonable amount of time, maybe a couple hours. And I'm super happy with how it turned out in the end. I might just have to buy some more to make some of the other projects using the coordinating patterns!
Happy knitting!
| Source |
Um, can we say "awesome"?!?! So I knew I had to create something with this yarn since it's so awesome and in my alma mater's colors (they also had other colors, but I didn't really care about them).
So I made this:
| Source |
![]() |
| Left: double-looped, Middle: triple-looped, Right: double-looped and pulled over head and ears |
I finished the scarf in a reasonable amount of time, maybe a couple hours. And I'm super happy with how it turned out in the end. I might just have to buy some more to make some of the other projects using the coordinating patterns!
Happy knitting!
Thursday, January 27, 2011
Thrifty Thursday: Yarn-Tainer Knock-Off
Today's Thrifty Thursday is a bit of a tutorial, as well as being thrifty, and needs a bit of explaining first.
I do a lot of crochet/knit projects, which means I use a lot of yarn. And I've seen these really cool Yarn-Tainers at Joanns that look super convenient, but they're pretty pricey. At least, they're more than cheap ol' me would like to spend.
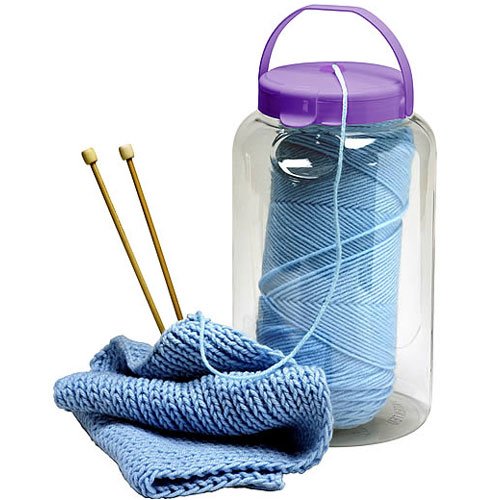
See how it contains the yarn and feeds it so nicely through the hole on top?! It was yarn-user's love at first sight.
Anyway, Matthew and I were in Joanns one day, and I was yearning for said yarn holders but refusing to spend the money. We left the store - me a little heartbroken - and walked a little ways down to the Dollar Tree (one of my favorite places - again, I'm cheap). I was browsing through the container aisle when a thought struck me. I could turn a container into a yarn holder for just pennies (100 to be exact)!
I grabbed the container and briskly found my way to Matthew, wherever he was browsing at the time, and told him my idea. And he thought it was awesome - he's all about being cheap (we're made for each other)!
Here's how to make your own:
- Purchase a plastic container from the Dollar Tree with a screw on top that's big enough to fit the skein of yarn you would like to use. (I happened to have yarn on me at the time - we'd just left Joanns, remember - and used that to figure it out. Mine is 3 quarts.)
- Take it home and have your handy-man - or do it yourself if you're skilled enough (I'm not) - drill a hole in the top of the container that's big enough to feed your yarn through.
- Smooth the hole down with a file, if you need to.
- Feed the yarn through the bottom of the lid, and put the rest of the skein inside your container.
- Screw on the lid, and you're good to go!
I saved approximately $7 using this method, and I'm pretty darn proud of that! How's that for being thrifty?!
Happy thrifting!
Subscribe to:
Posts (Atom)